Release 8.0
Grouped Tasks Builder
What is it and why do you want it?
The Grouped Tasks functionality has been introduced in R6.0. Configuring these could be complicated. In R8.0 this has been significantly been simplified by the implementation of the Grouped Task Builder and Grouped Task Executor
How do I use it?
Configuring a Grouped Task Definition
- Go to the Knowledge Base in UXF
- Click New
- Click Task Planner
- Fill in the fields for the Grouped Task Definition
- Go to the Builder tab in the newly created Grouped Task Definition
- Click + Add New Task
- From Scratch > Create a Simple Task Definition
- From Template > Allows for browsing existing Assessment Definitions, Job Definitions or Maintenance Plans
- Verify that Recurrence has been set on the Grouped Task Definition level
- Add any details as needed
- Add a Recurrence schedule: the recurrence field is a reference to cmn_schedule and can be used in two ways:
- OOTB schedules. Can be added by adding schedules with the Type == 4Industry Grouped Task - Default.
- Custom schedules. Can be added by clicking the calendar icon in the recurrence field in the editor pane. This opens the Schedule Component where you can create a custom schedule with more customization options
- NB: No Task Instances will be created if the recurrence has not been set
- Publish the Grouped Task Definition
- You can now either:
- Manually request a Grouped Task Instance with Task Instance records (note that the Grouped Task Instance should have Ad-hoc == True to show up in the Knowledge Base)
- Trigger the schedules manually by running scheduled job: AP4 - Generate Grouped Task Instances
- Wait until the scheduled jobs triggers by itself every day.
- The Grouped Task Instances can now be opened either in UXF or in mobile by going through the Grouped Task Instance and then 'Tasks' tab
How do I configure it?
No additional configuration is needed. In order to test the Grouped Task Instance generation, is important to set the property below to true in order to trigger the generation of Grouped Task Instances.
Properties:
| Property | Description |
|---|---|
| x_ap4_scm_tmg.groupedTaskDebug | Set to true to always trigger weekly/monthly grouped task generation for the current week and month. |
.png?version=1&modificationDate=1643790115000&cacheVersion=1&api=v2&effects=drop-shadow&width=851&height=400)
Grouped Tasks Executor
What is it and why do you want it?
The Grouped Tasks functionality has been introduced in R6.0. Configuring these could be complicated. In R8.0 this has been significantly been simplified by the implementation of the Grouped Task Builder and Grouped Task Executor
How do I use it?
NB: Make sure to complete the steps above first.
- Open the Grouped Task record above
- Navigate to the 'Tasks' tab
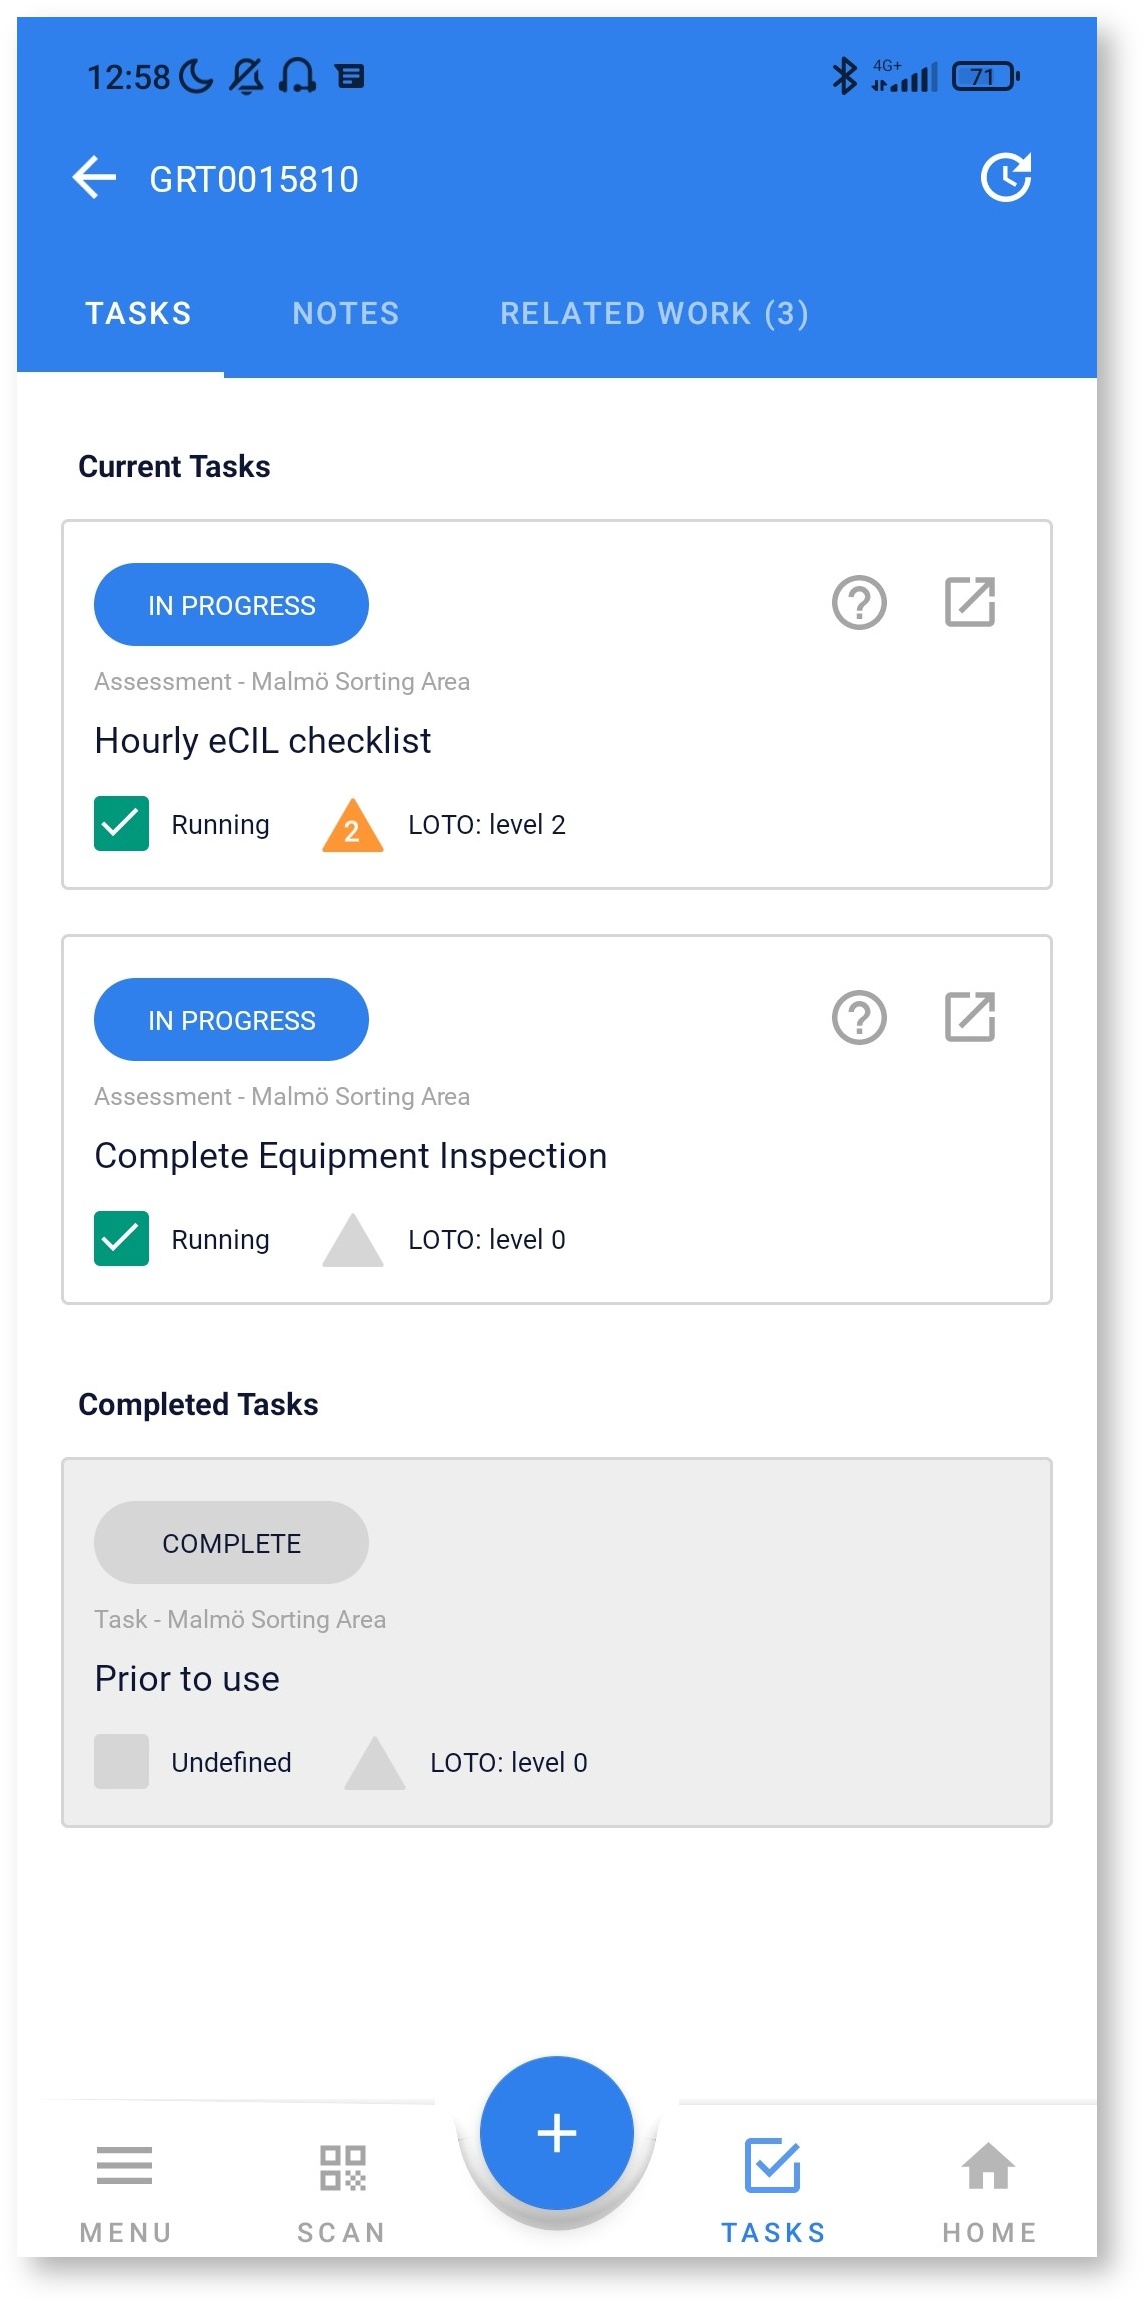
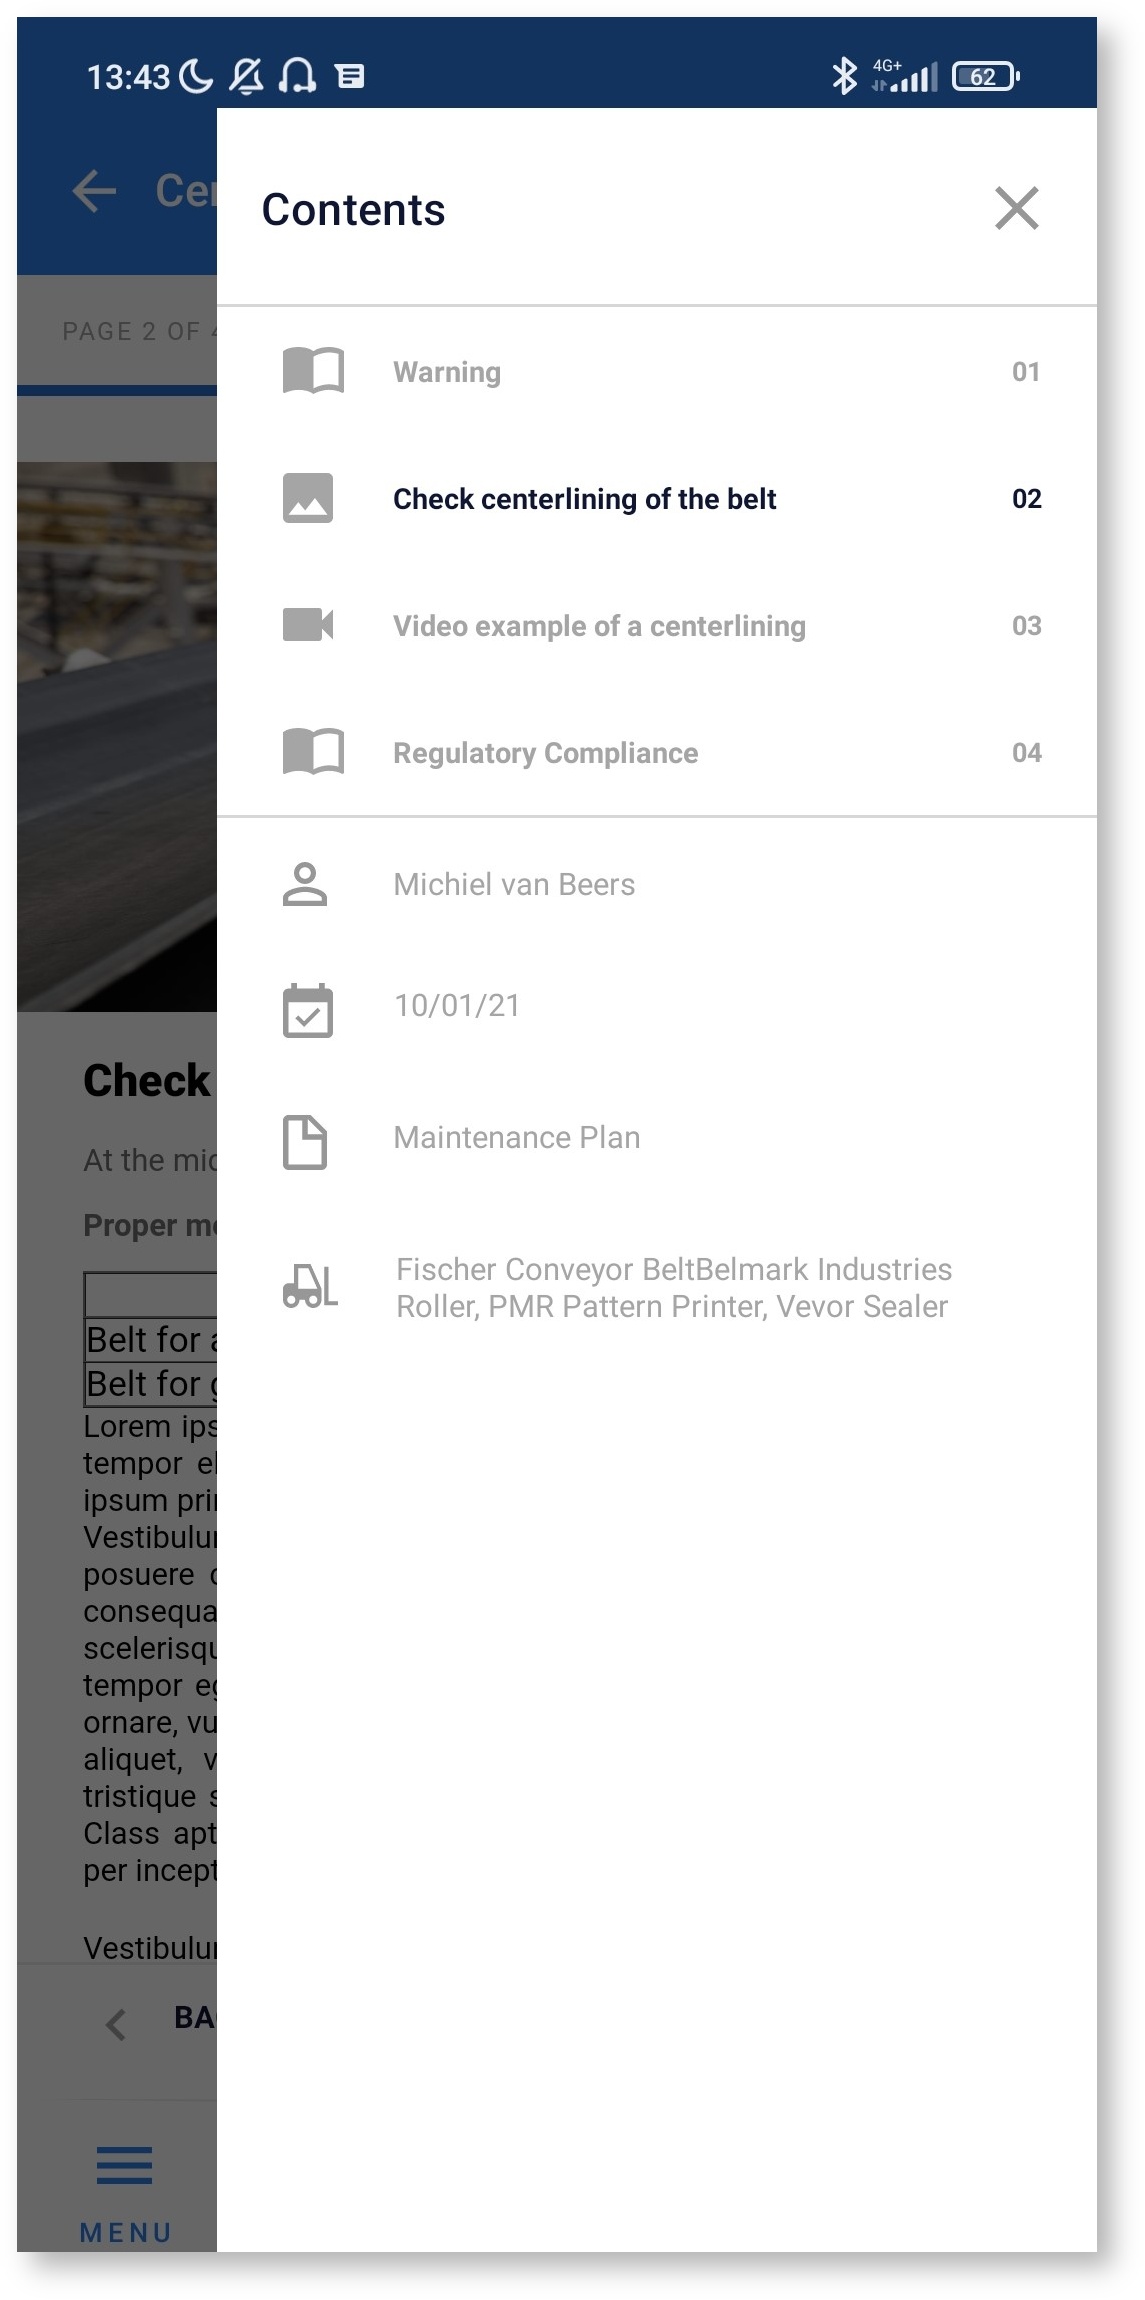
- You'll see the following:
- For simple task records:
- an expandable card with a slider that is either (1) normal from 0 - 100 or (2) (when there is an average duration available in the Simple Task Definition record) colored according to the following formula:
- Green = 0 - 1.25 * Average Duration
- Yellow = 1.25 * Average Duration - 2 * Average Duration
- Red = 2 * Average Duration - 4 * Average Duration (= upper boundary)
- Close Notes input field (write directly to the close notes)
- 4 Buttons to change the state of the record
- an expandable card with a slider that is either (1) normal from 0 - 100 or (2) (when there is an average duration available in the Simple Task Definition record) colored according to the following formula:
- For other Task Instances:
- An overview with the most important information of that record: Task Type, Equipment, Work Area, Short Description, Line Status, LOTO Level, PPE, Tools and Materials, Knowledge Article and State
- For simple task records:
How do I configure it?
No additional configuration is needed. In order to test the Grouped Task Instance generation, is important to set the property below to true in order to trigger the generation of Grouped Task Instances.
.png?version=1&modificationDate=1643720125000&cacheVersion=1&api=v2&effects=drop-shadow&width=851&height=399)
Dynamic Tasks
What is it and why do you want it?
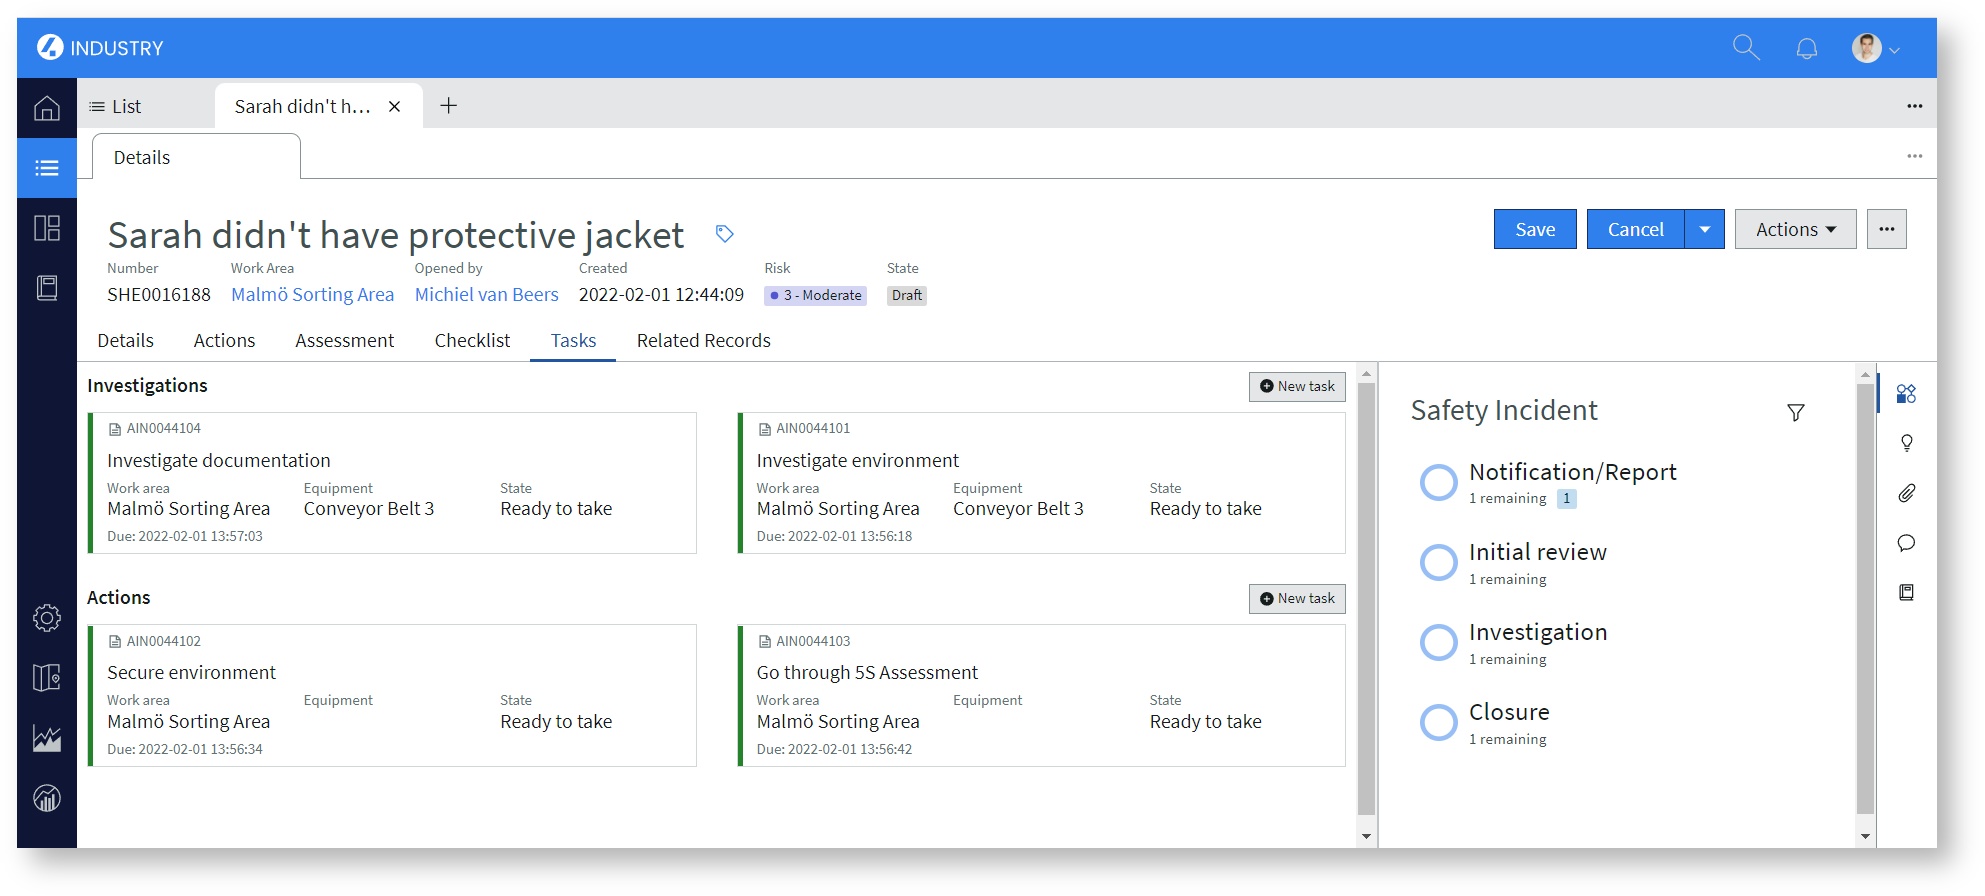
For some tasks (e.g. Devations or Safety issues) you should often do the same planned task multiple times based upon whether a task is in a specific category. The Dynamic Tasks allows you to configure an additional tab with sections where you can request and view related tasks.
But, don't we have the Related Work for this already? Correct, but two important differences are that (1) you can request tasks on the Dynamic Tasks Tab and (2) it only filters on Parent == Current Task. In R9.0 we are going to update the Related Work tab to don't show any Parent tasks anymore.
How do I use it?
Using the Dynamic Section is straightforward:
- Go to a record that matches a Dynamic Task Configuration (see below)
- Click the Tasks tab (both mobile and UXF)
- Click the ( + ) or + New Task button to request a new Task Instance for that section
- After requesting, the task will show up in the related section
How do I configure it?
There are two new modules in the back-end:
- Dynamic Task Configurations: here you set the table, location and condition to use for when to show/hide the Tasks tab. Note that the filter cannot contain complex queries (e.g. javascript), since is must be parsed by the mobile application.
- Dynamic Task Sections: Related List of the Dynamic Task Configuration. Here you set which Task Definition you want to display in Dynamic Task Section.
Note: We've also added a new Task Definition: x_ap4_scm_tmg_simple_task_definition. This is a generic task type that can be used for multiple different purposes. This record is also locally created on the mobile device, instead of requested in the back-end.
Target Questions (Boolean, Choice, Numeric Scale)
What is it and why do you want it?
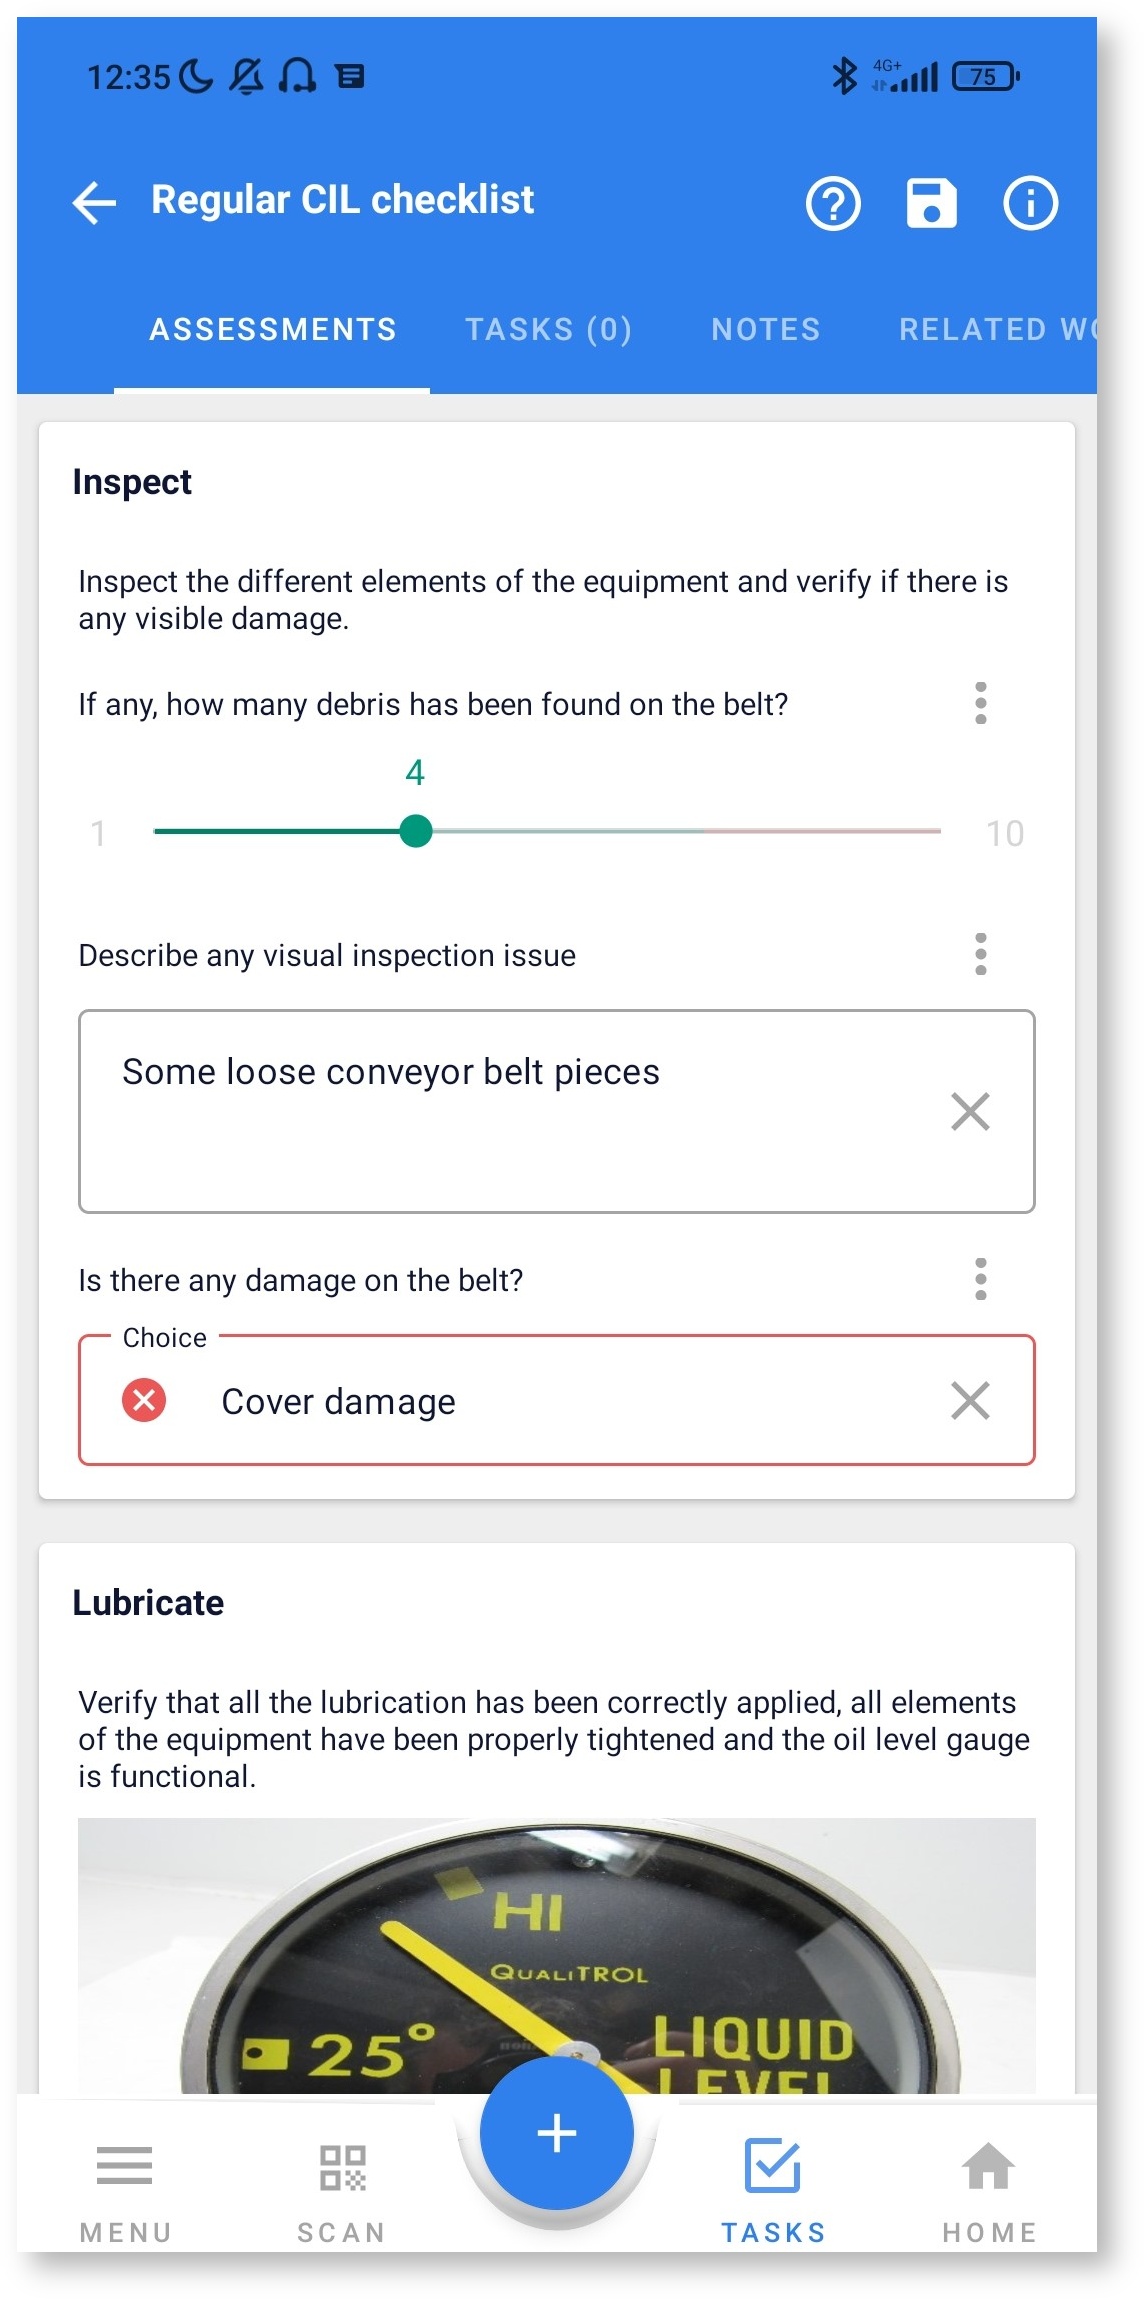
They say there are no wrong questions, but.. there may be wrong answers. To indicate to the end-user what the desired answer is, you can set target values in three categories: Good, Bad or Neutral.
How do I use/configure it?
Target Questions can at this point only be configured through the back-end (in R9.0 we'll introduce a completely renewed Assessment Builder in UXF). Take the following steps to access the record:
- Create a new Task Definition through the Knowledge Base in UXF
- Go to the Assesssment Builder
- Add a Boolean, Choice, or Numeric Scale question
- In the Question Editor, click 'Open question in back-end'
- Set the target values as described below
Boolean (NB: This target question is currently only available for mobile)
- When the target_scale == high, set YES to red and NO to green
- When the target_scale == low, set YES to green and NO to yes
Numeric Scale
- When the target_scale == high, start the scale with the red color
- When the target_scale == low, start the scale with the green color
- The threshold_neutral determines the change to yellow
- The threshold_positive determines the change to green
Examples:
1 ========== 10
- target_scale = high
- threshold_positive = 7 (determines switch yellow to green)
- threshold_neutral = 3 (determines switch from red to yellow)
1 ========== 10
- target_scale = low
- threshold_positive = 3 determines switch green to yellow
- threshold_neutral= 7 determines switch from yellow to red
1 ========== 10
- target_scale = low
- threshold_positive = 7 determines switch green to yellow
- threshold_neutral= 7 determines switch from yellow to red
1 ========== 10
- target_scale = low
- threshold_positive = 1 determines switch green to yellow
- threshold_neutral= 7 determines switch from yellow to red
Choice
- When the answer is Bad: Show a red border and a red cross icon
- When the answer is Neutral: Show a yellow border a yellow exclamation icon (= missing in the component design, but lay-out is the same as with the Image Buttons)
- When the answer is Good: Show a green border a green checkmark icon
.png?version=2&modificationDate=1643802075000&cacheVersion=1&api=v2&effects=drop-shadow&width=851&height=400)
Dynamic Table Synchronisation
What is it and why do you want it?
In order to support more flexibility in task types and creating those from mobile, we now allow for adding tables to sync to mobile.
How do I use/configure it?
The setup is straightforward: the tables in the Table Configuration module are the onces that are synced to mobile. Make sure to set the correct filters for both the Full Sync and Partial Sync to prevent too little/much records to be synced. If you want to show the task records in a form or list, you should also set 'Sync Form and List Layout' to true.
Configuration
Important: in order for the sync to work correcty, you should set both the /wiki/spaces/4IN/pages/755586 and Sync Configuration. Please check the links for the default configuration.
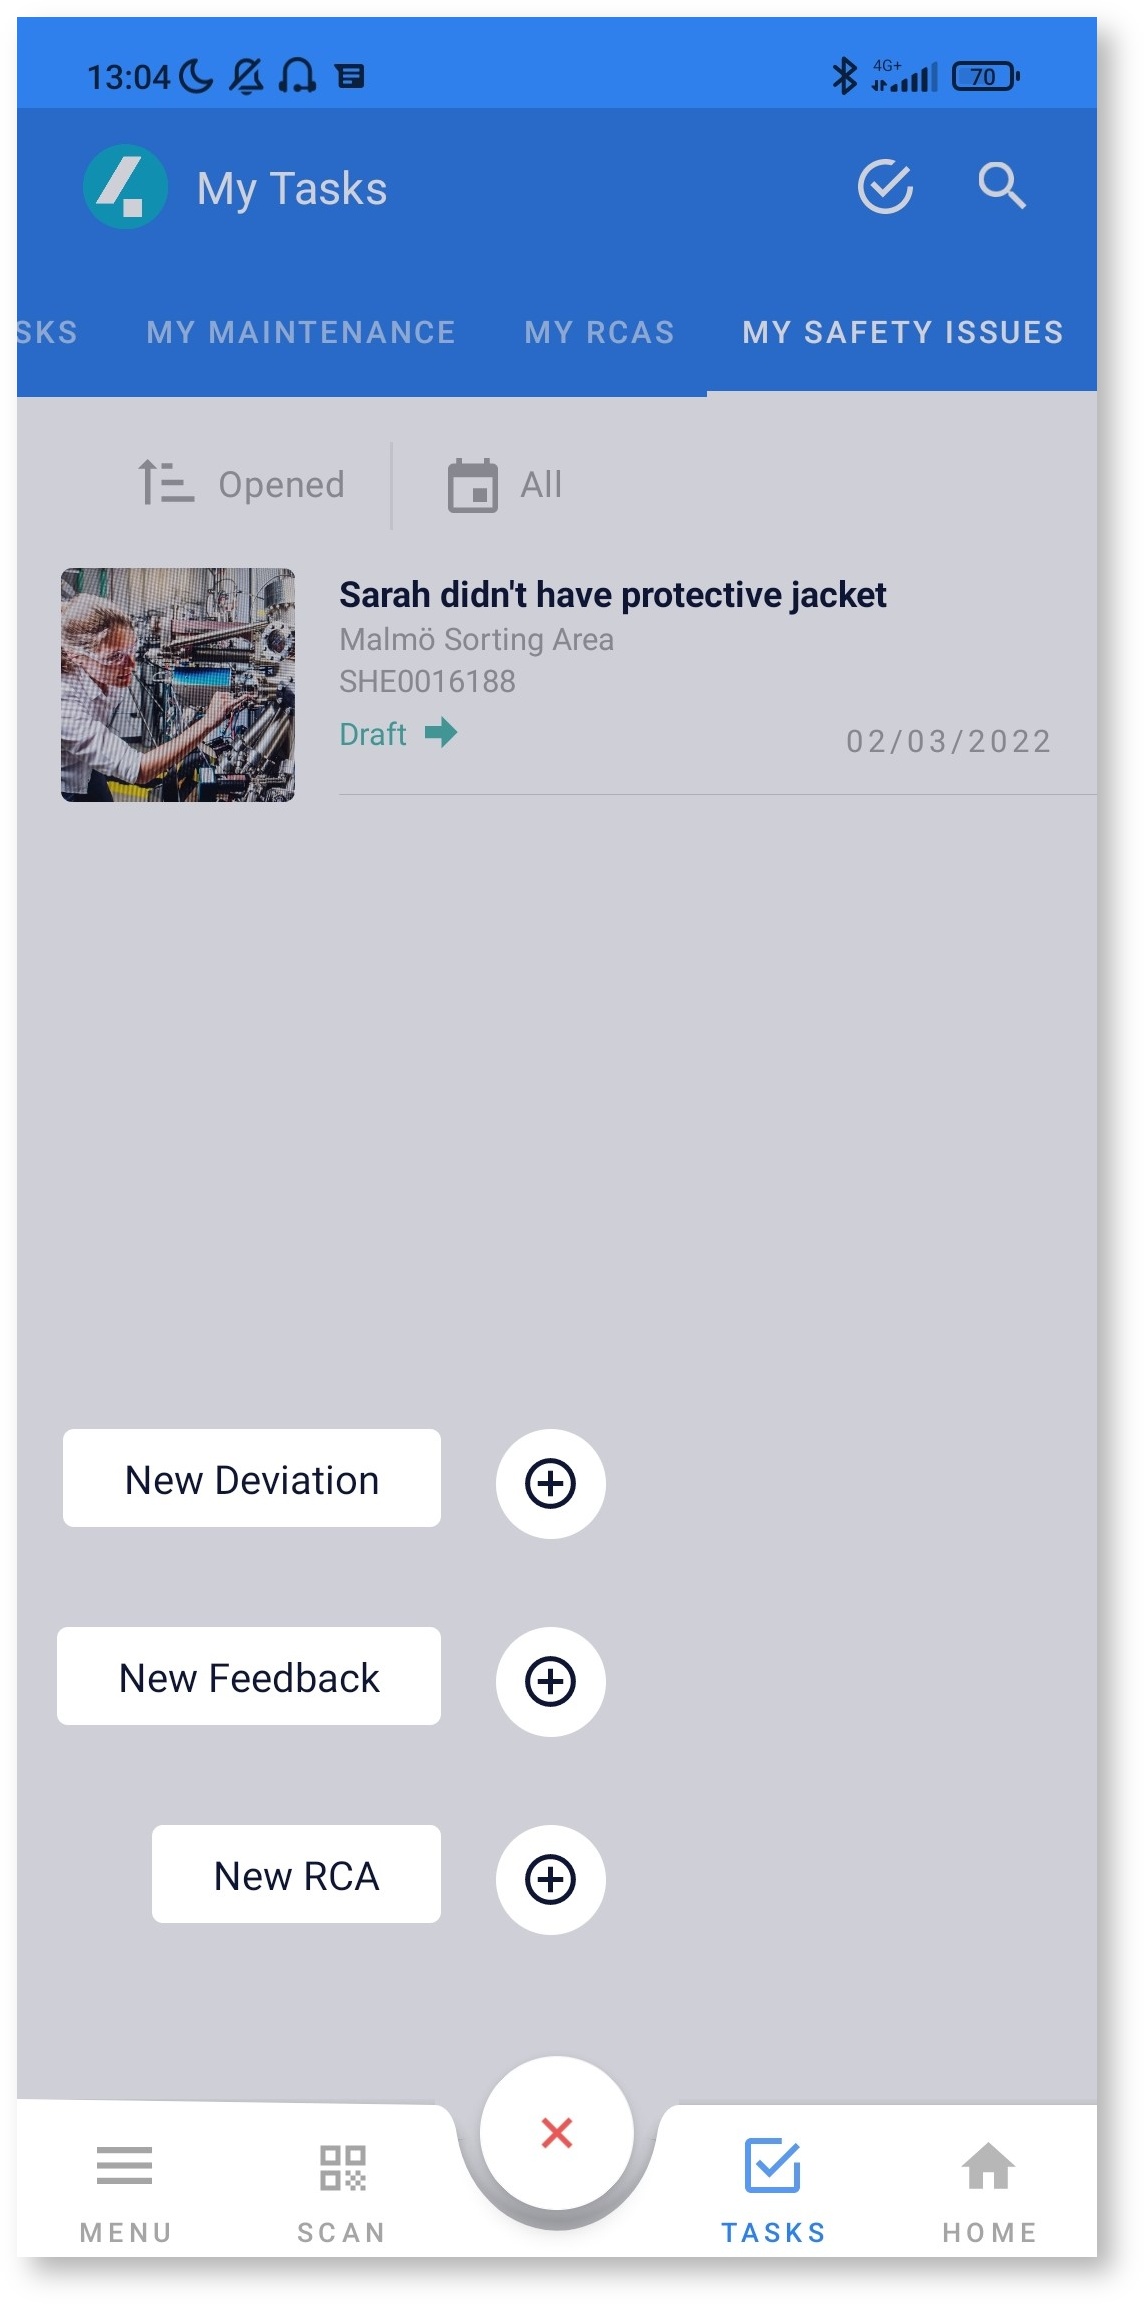
Configurable FAB Button
What is it and why do you want it?
With the implementation of the Dynamic Table Sync (see above) we now also allow the ability to add any table to the Floatin Action Button on mobile to easily create any type of record you want
How do I use/configure it?
- In the FAB action module in the back-end, create a new record
- Set the following fields:
- ID: Technical id
- Name: Label you want to show on the FAB to the end-user
- Type: Action (set automatically)
- Table: Table for which you would like to create a record
- Go to the User Profile to which you want to the new FAB action
- Add to the Actions in the User Profile
- Note: only the first three actions will be shown in mobile
- Make sure you have the following this configured for the table set in Step 2d:
- Added to Table Configuration (see above).
- Set 'Sync Form and List Layout' to true in the Table Configuration
- Create a 'mobileapp' form view configuration
- Click the – Clear Cache module
- Full Sync on mobile
Multiple Equipment Models
What is it and why do you want it?
Currently, you can only assign one Equipment Model and one Work Area to a Task Definiton. In this release we are adding the Additional Equipment Models field to the Task Definition table to extend on this. In future releases this will be the only field used for simplicity
How do I configure/use it?
- Create a new Task Definition
- Add as much Additional Equipment Models as you like
- Publish
- Go to mobile and Full Sync
- Open an equipment that is part of one of the Equipment Models that you've added in step 2
- The Task Definition that you've created should be visible there.
The field has also been added to the suggestion engine that adds tasks to the Suggested Work tab on mobile
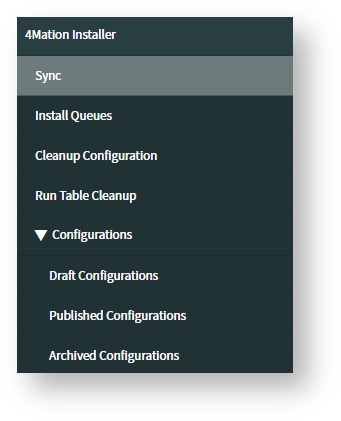
4Mation Installer
What is it and why do you want it?
The 4Mation Installer is the go-to for installing existing environments, deploying hotfixes and upgrading to new releases. In the release we've also added some improvements to the new installer. (Also note the Breaking Changes below)
Changelog
- Added error field to Install Queue where error will be written to
- Applications can be selected from a dropdown
- Added Plugins, Applications, Demo Data and Sprint to Types
- Added Clean Tables module that can be used to easily remove data from instances
- Added property to determine which records you want to sync from other instances (to improve sync speed)
Properties:
| Property | Description |
|---|---|
| x_ap4_4mation_inst.synced_configuration_types | Comma separated value string with types of configurations that will be synced by the installer |
Breaking Changes
- Note that all new front-end features described above, are only supported in UXF. The old Service Portal is not being actively maintained and will be depricated in R11.0
- Child Task Definitions are no longer linked through Grouped Task Definitions through the Execution Plan Tasks (x_ap4_scm_tmg_execution_plan) but through the Grouped Task Entry (x_ap4_scm_tmg_grouped_task_entry) table. The Execution Plan Tasks should still work through the Task Planner, but are not the recommended way of planning Grouped Tasks
- To make sure that all hardcoded tables in the mobile applications are now loaded in the Table Configuration, a fix scripts runs on installation to add any tables that are missing from this overview. If a record already exists, it is not updated, so please make sure to verify that you configuration matches the default table configuration.
- The FAB actions have been moved from the sys_ui_element table to x_ap4_scm_mob_api_fab_action table. On installation a fix script should run that copies all existing actions over to the new tables. Please verify to make sure that your configuration works as expected.
- The 4Mation Installer has a newly added reference field to the sys_app table to allow for easy configuration. Please note that any configuration created from now one, will only have that field filled. The 4Mation Installer does work with old configurations.